Although beeswax needs to be melted in order to be mixed, it has a relatively low melting point of 62-64 degrees centigrade. This means that while double boiling is required, it’s a standard home kitchen affair. Also, you won’t need to heat the other oils in your mixture to a temperature that will damage them. More delicate or volatile ingredients such as essential oils can be added after the mixture has been removed from the heat.
If all this seems terribly obvious, please feel free to skip right over this post. I’ll be posting again soon with some beeswax recipes. I want to make sure you know what to do though, so I thought some step-by-step instructions might be helpful.
First of all, getting hold of beeswax may or may not be tricky for you, depending on where you live and who you know. I get some from a family friend who keeps hives, but before that I struggled a bit to get hold of it. I narrowly missed some at a local health food shop, and did eventually get it from an art and crafts supplies outlet. In many places you can order it online.
If you can source it, the pellet form is the easiest to melt. I have only ever been able to get blocks of beeswax though. This you can grate, which I used to do, to make melting much quicker. But the time and effort spent grating doesn’t seem worth it to me, so now I just chop it roughly and wait longer for it to melt.
If you, like me, don’t have a double boiler, it is easy to put together a setup that will give the same result.
You will need
- A stove
- A metal pot or saucepan, large enough for:
- A sturdy glass or Pyrex wide-mouthed jar, jug or bowl, or a smaller pot, that will fit inside the pot with some space available round the edges (for water).
- If you are only making a small quantity, you can do your melting and mixing in the same container you will store your product in to save on cleaning up.
- A metal spoon (don’t use wood)
- An oven mitt – things get hot
- Beeswax – solid, chunks, grated, or in pellets (lucky you)
What you do
- First, stand your jug, jar or bowl (I am going to refer to this as “the jug” from now on) inside your pot.
- Fill the pot with water to about half way up the jug (don’t allow ANY water inside the jug).
- Remove the jug again now that you know how much water you’ll be needing, and bring the water to the boil.
- Reduce the heat so that the water remains simmering gently.
- Place your beeswax in the jug.
- Replace the jug carefully inside the pot of boiling water. Keep the water simmering.
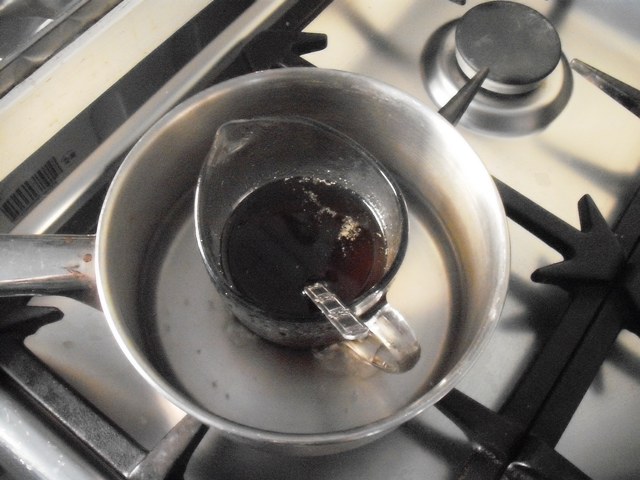
- Stir more or less continuously until the beeswax has completely melted. Use a metal spoon. Make sure NO water gets in with the wax.

melting beeswax
- Add whatever other oils or butters you are using after the beeswax has melted. (Many oils and butters, such as coconut oil or grapeseed oil, are robust enough to be heated along with the beeswax. However, some are affected by exposure to heat, for example, shea butter tends to become grainy, so it is best to be safe.) Other ingredients which require melting, such as coconut oil, will do so much faster than the beeswax.
- Do NOT add any essential oils while the mixture is still on the heat. They may be damaged by the heat and will escape into the air very quickly. Stir until all your ingredients are melted and combined.
- Once all these ingredients are completely incorporated, switch off the heat and carefully remove the jug from the pot of water. Allow it to cool slightly before adding any essential oils.
- You need to work briskly from this point as the beeswax will begin to firm up as soon as it is removed from the heat. But don’t worry; if it becomes too firm to work with you can always re-melt it again by replacing the jug into boiling water.
- As soon as your mixture is ready, pour it into whatever containers you’ll be storing it in.
- Leave your containers to cool. You can put them in the fridge to set faster if you like. Don’t be tempted to touch for a couple of hours at least, less you mess up the pristine surface.
- Pat yourself on the back – you did it! And wasn’t it easy?
Now, about cleaning up…
I’ll leave that for next time.